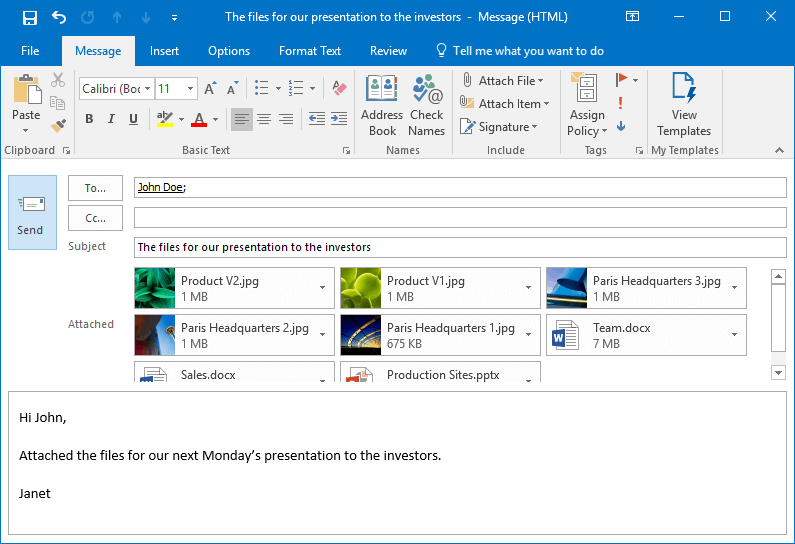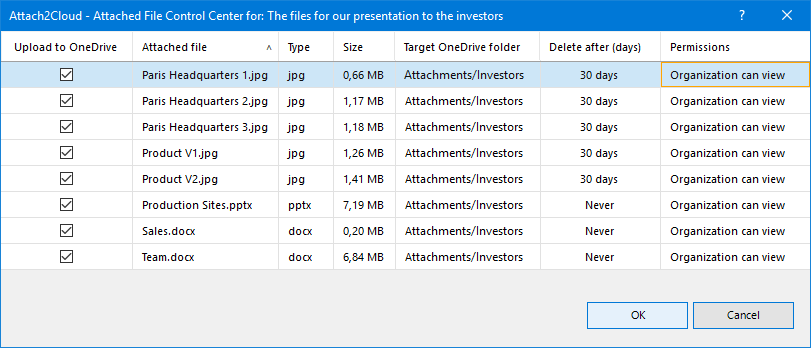
When pressing the Send button of your MS Outlook email form:
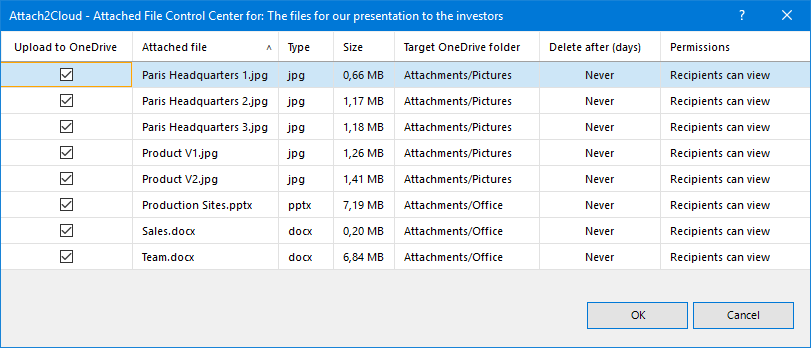
Attach2Cloud can be configured to instantly display the Attached File Control Center, giving you the full control on the upload of your attached files to OneDrive, in a single panel:
You don’t want to upload a given attached file to OneDrive?
Simply uncheck the corresponding “Upload to OneDrive” checkbox.
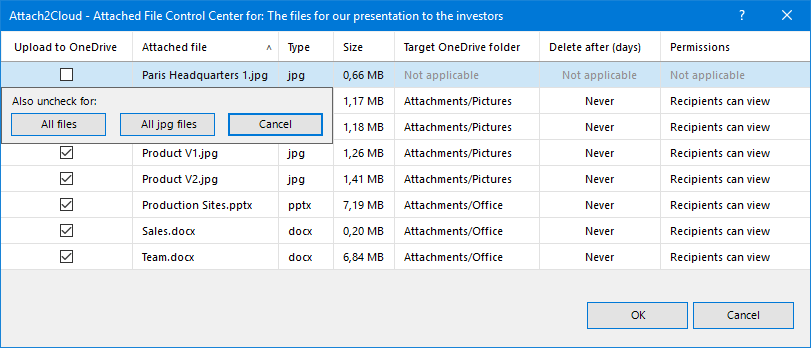
When unchecking an “Upload to OneDrive” checkbox, a floating window is automatically displayed enabling you to uncheck all files, or all files of the same type as the file you just unchecked, in one click.
This floating window is automatically cleared when you click anywhere in the main window. (You do not need to click Cancel).
You would prefer to upload an attached file to a OneDrive folder other than the default Attachments folder?
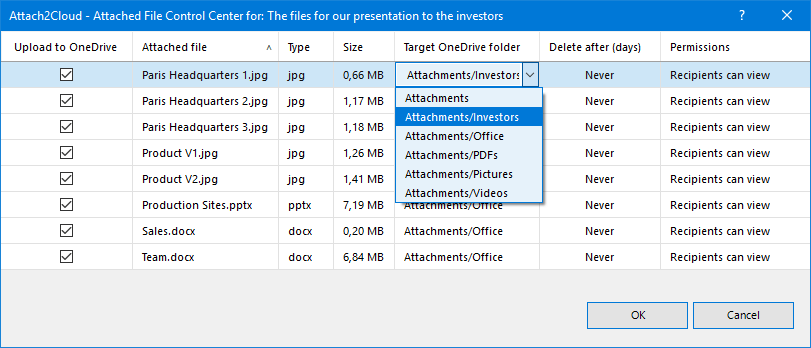
Simply click on the “Target OneDrive Folder” cell and select your preferred target OneDrive folder among a list of pre-defined folders.
The list of OneDrive folders displayed when clicking the “Target OneDrive folder” cell can be (fully or partially) centrally managed or (fully or partially) managed by the user.
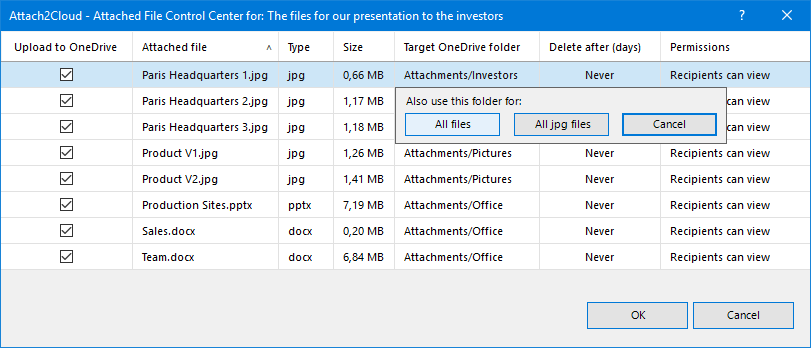
See that, when you select a different target OneDrive folder for your attached file, a floating window is automatically displayed, enabling you to also apply, in one click, the selected folder to all files, or to all files of the same type as the file you just edited.
This floating window is automatically cleared when you click anywhere in the main window. (You do not need to click Cancel):
If you click the “All jpg files” button, Attach2Cloud takes the opportunity to ask you if you want to create a rule based on the action you just performed. If you plan to always upload your jpg attached files to the OneDrive folder you just selected, it is a good idea to click Yes.
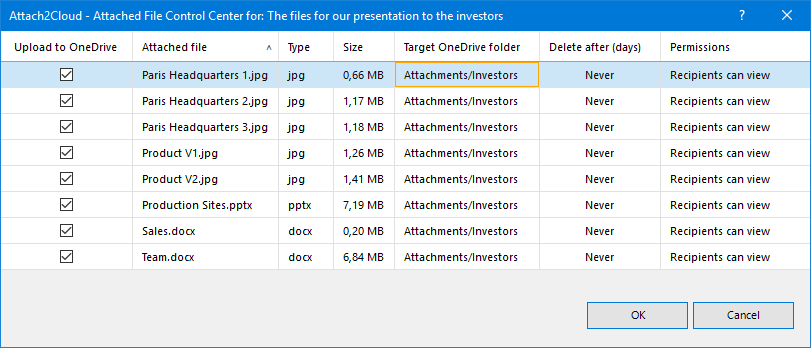
Let’s click on “All files“.
Your attached files are now set to be uploaded to the selected OneDrive folder:
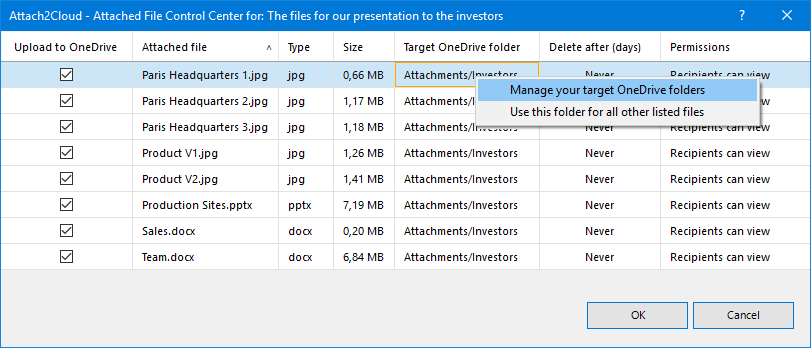
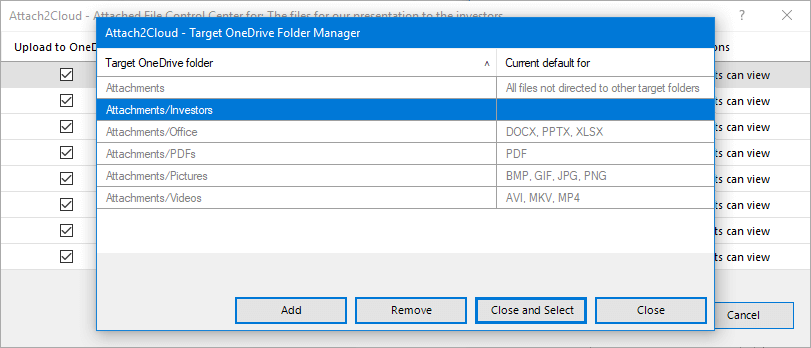
The contextual right-click Manage your target OneDrive folders menu displayed when doing a right-click on a Target OneDrive folder column cell enables to manage your target OneDrive folders:
You can add as many target OneDrive folders as you need. Attach2Coud will create them automatically if they don’t exists.
These folders will be listed in the combo-list displayed when clicking on the “Target OneDrive folder” column cells.
You don’t want to keep a given uploaded attached file forever in OneDrive?
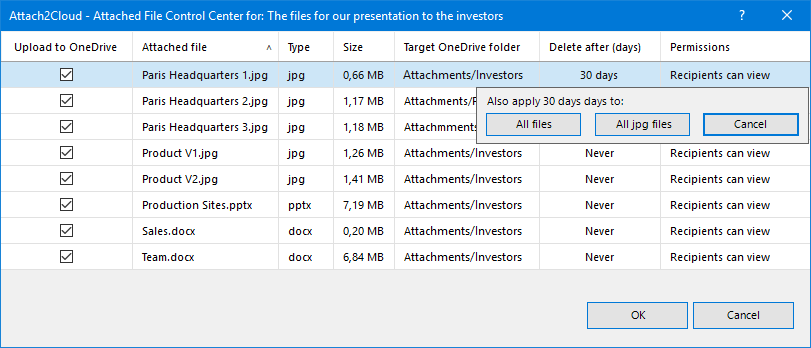
Simply ask Attach2Cloud to delete this file from OneDrive after a given number of days by entering this number of days in the “Delete after (days)” cell.
See that, when you enter and validate a number of days, a floating window is automatically displayed, enabling you to also apply this number of days to all files, or to all files of the same type as the file you just edited, in one click.
This floating window is automatically cleared when you click anywhere in the main window. (You do not need to click Cancel).
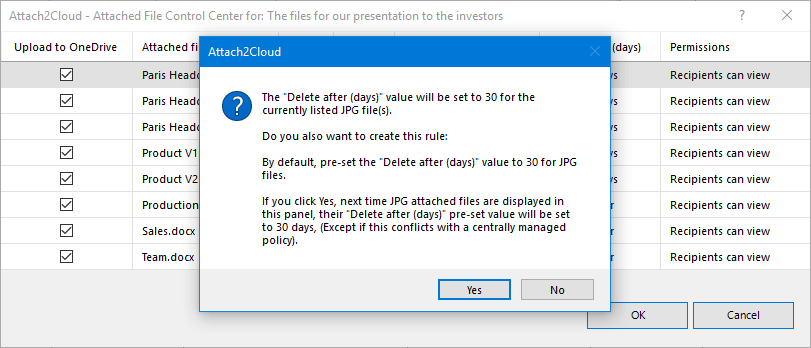
If you apply the number of days you just entered to All jpg files (by clicking the “All jpg files” button), Attach2Cloud takes the opportunity to ask you if you want to create a rule based on the action you just performed.
If you want Attach2Cloud to always delete the attached jpg files uploaded to OneDrive after 30 days, it is a good idea to click Yes:
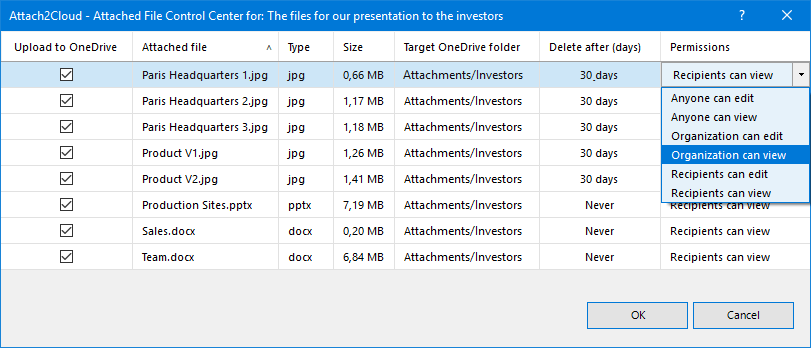
The proposed OneDrive Permission is not the one you need?
Simply select another one by clicking on the “Permissions” field.
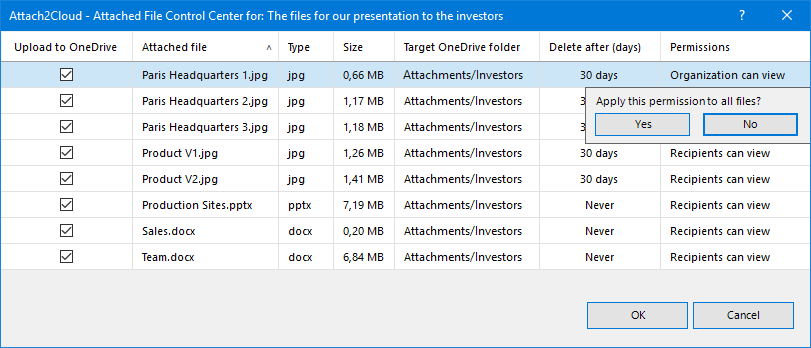
See that, when you select a OneDrive permission to apply to a file, a floating window is automatically displayed enabling you to apply this permission to all files, in one click.
This floating window is automatically cleared when you click anywhere in the main window. (You do not need to click No):
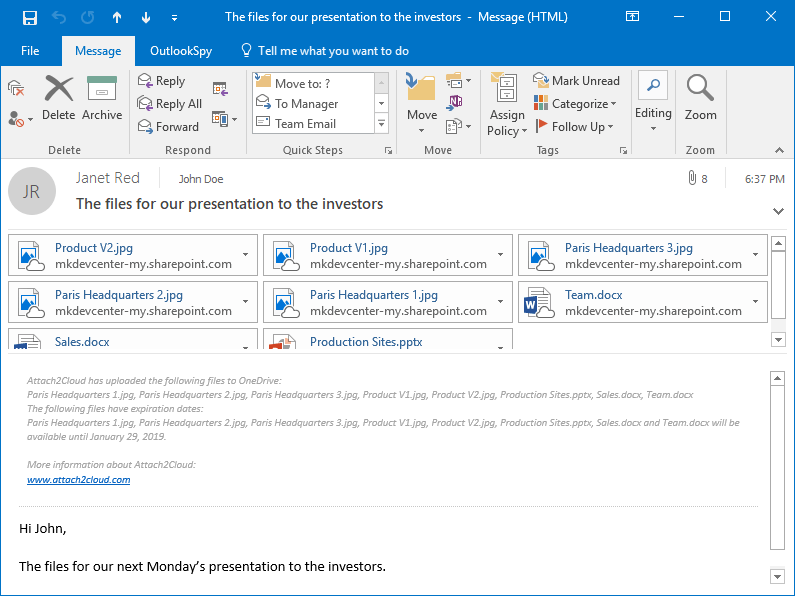
Attach2Cloud will manage to automatically upload your attached files to OneDrive as per your instructions and to replace the uploaded attached files by OneDrive shortcuts in your email being sent.
There is no delay implied. As soon as you click OK, your email is put in the Outlook Outbox and will be sent as soon as the upload of the attached files to OneDrive is finished. You can continue working in MS Outlook during this time.
This is the email received by John. The attached files have been replaced by OneDrive shortcuts:
The copy of the sent email stored in your MS Outlook Sent Items folder contains the same OneDrive shortcuts.
The comment you see at the top of the email body has been automatically inserted by Attach2Cloud. This comment is optional and configurable.
The Attach2Cloud Administrators can define and manage Attach2Cloud usage policies centrally. For instance the upload of some files to OneDrive can be forced based on their size or their types.
In case some files listed in the Attach2Cloud Attached File Report fall under the control of centrally managed usage policies, they appeared greyed out and users cannot modify the attached file properties under the control of the policies.
For instance if an Attach2Cloud centrally managed policy forces the upload of all files larger than 15 MB to OneDrive and if some files exceeding this size limit are displayed in the Attach2Cloud Attached File Control Center, they appear greyed-out and the “Upload to OneDrive” checkbox is checked and locked. Users can’t uncheck it.
These policies are registry parameters that can be centrally managed using Windows GPOs (Group Policies Objects) or any other administration solution enabling to centrally manage user registry parameters.
